- Android Studio (Beta) 0.8.6
- Google Android Maps API
What?
I am writing an app for a tablet running Android and wanted to include a Google Map. The following exercise focuses solely on creating an app which opens Google Maps at your current location.
How?
I couldn't find any instructions using the tools I had (Android Studio) which is why I've written this article.
- Start "Android Studio"
- Go to File and create a New Project...
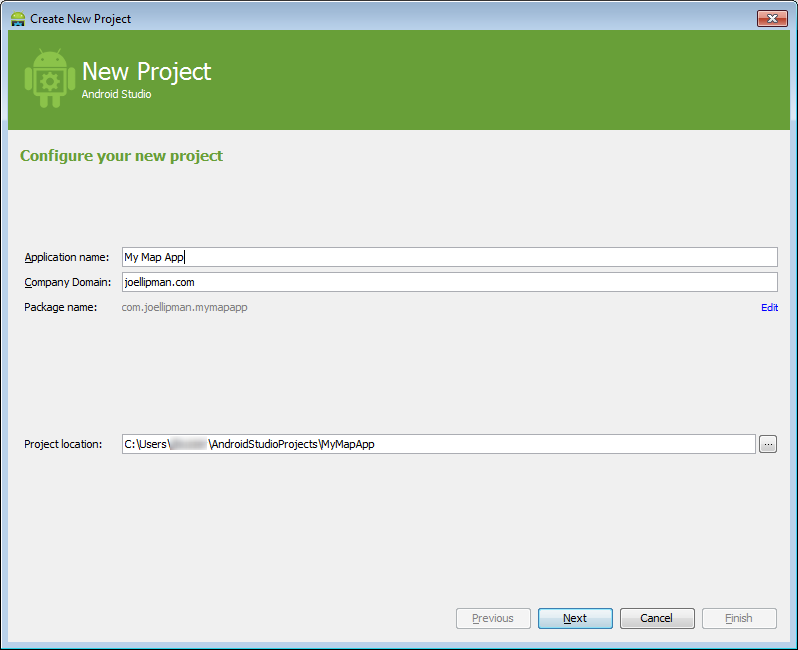
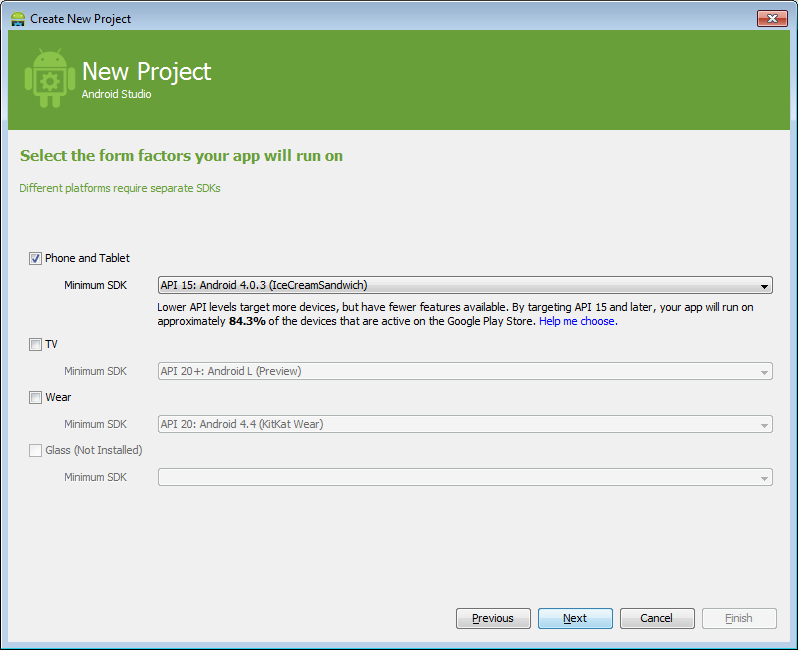
- I'm developing on a Tablet so I select Phone and Tablet then a relatively old version of the Android OS:
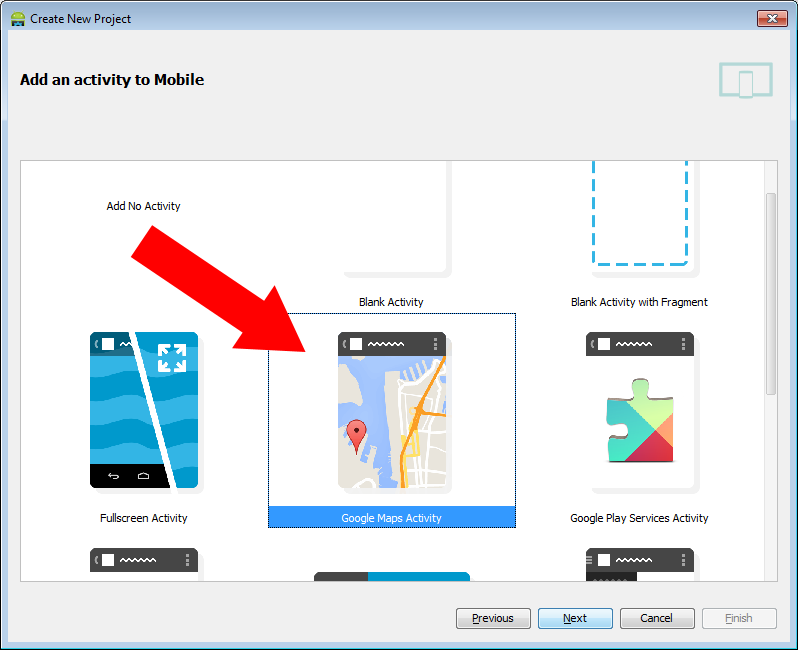
- Add an activity to Mobile: select Google Maps Activity:
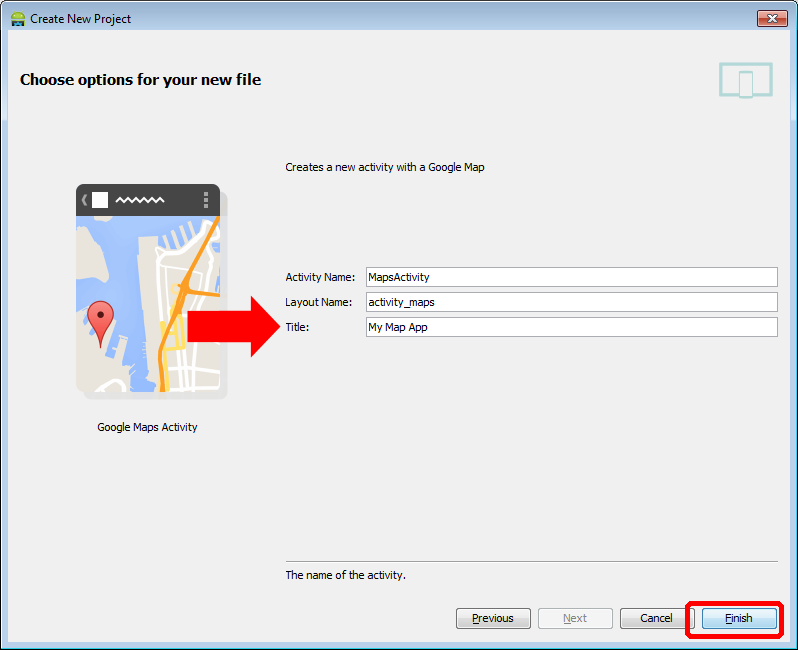
- Change the Title to what you want (don't change the activity or layout) and click on Finish:
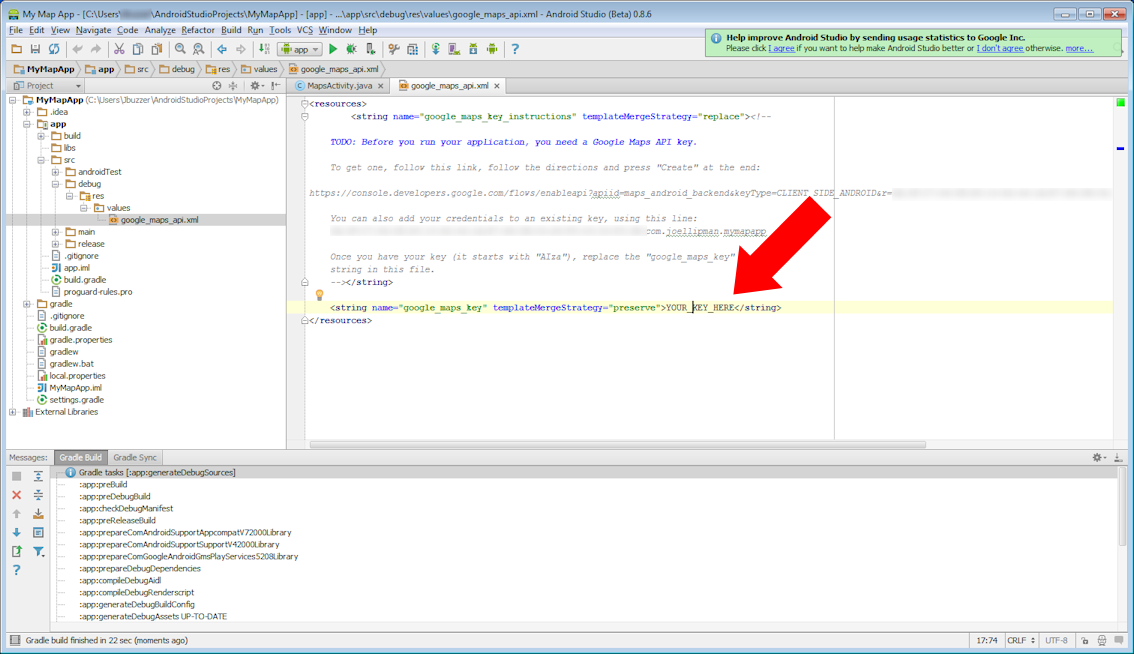
- Get yourself a developers' Google Android Maps API Key (not necessarily the same as Google API Key) and enter it as instructed:
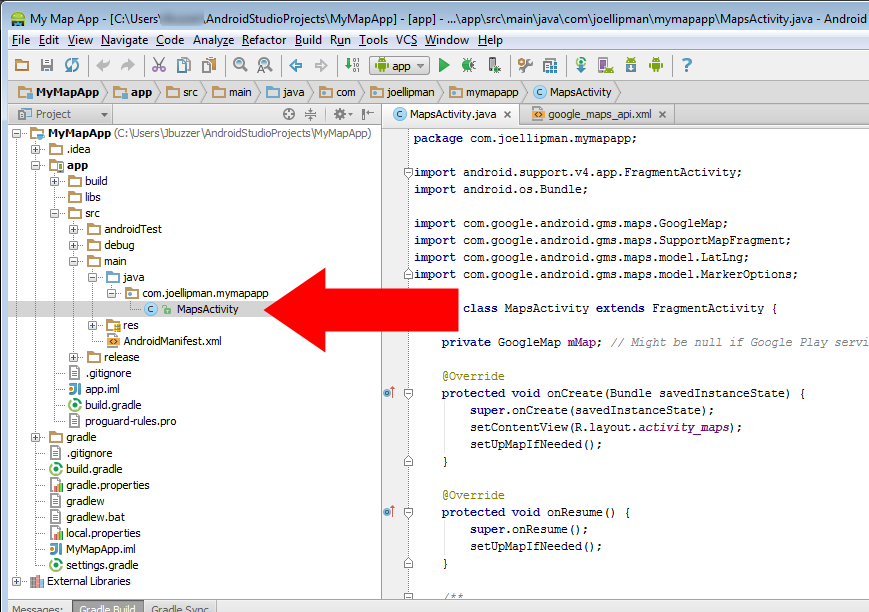
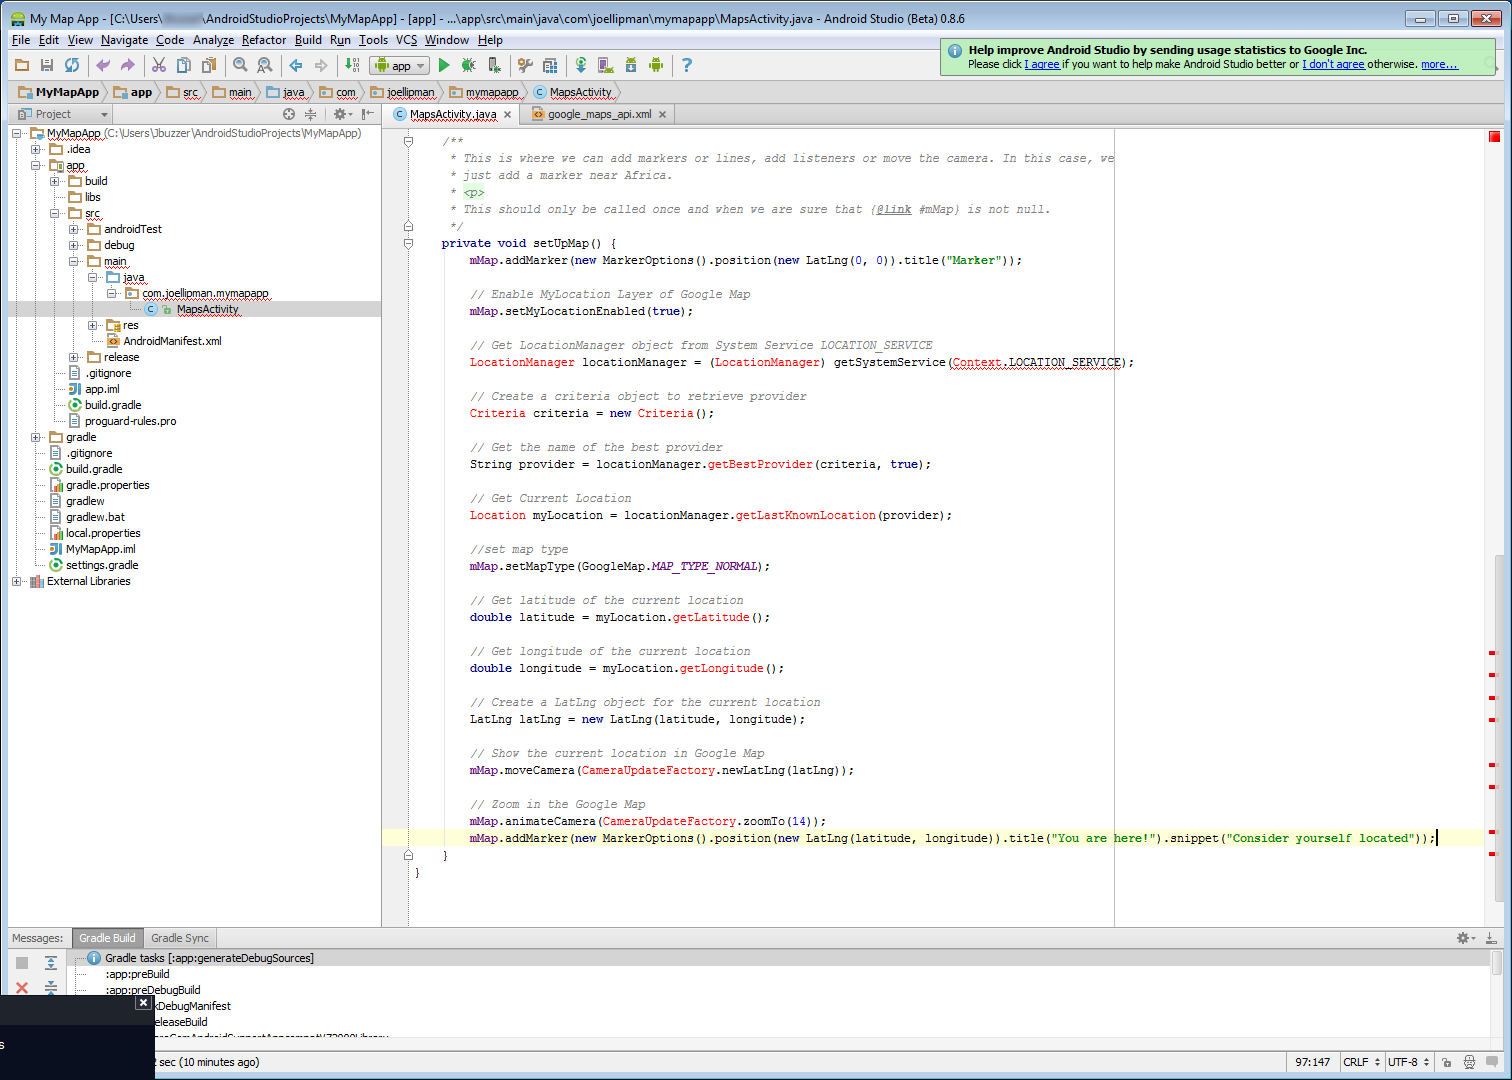
- Change the Java file to open on your current location, find the MapsActivity.java file and open it:
- Change the function setUpMap() to the following codecopyraw
private void setUpMap() { mMap.addMarker(new MarkerOptions().position(new LatLng(0, 0)).title("Marker").snippet("Snippet")); // Enable MyLocation Layer of Google Map mMap.setMyLocationEnabled(true); // Get LocationManager object from System Service LOCATION_SERVICE LocationManager locationManager = (LocationManager) getSystemService(Context.LOCATION_SERVICE); // Create a criteria object to retrieve provider Criteria criteria = new Criteria(); // Get the name of the best provider String provider = locationManager.getBestProvider(criteria, true); // Get Current Location Location myLocation = locationManager.getLastKnownLocation(provider); // set map type mMap.setMapType(GoogleMap.MAP_TYPE_NORMAL); // Get latitude of the current location double latitude = myLocation.getLatitude(); // Get longitude of the current location double longitude = myLocation.getLongitude(); // Create a LatLng object for the current location LatLng latLng = new LatLng(latitude, longitude); // Show the current location in Google Map mMap.moveCamera(CameraUpdateFactory.newLatLng(latLng)); // Zoom in the Google Map mMap.animateCamera(CameraUpdateFactory.zoomTo(14)); mMap.addMarker(new MarkerOptions().position(new LatLng(latitude, longitude)).title("You are here!").snippet("Consider yourself located")); }- private void setUpMap() {
- mMap.addMarker(new MarkerOptions().position(new LatLng(0, 0)).title("Marker").snippet("Snippet"));
- // Enable MyLocation Layer of Google Map
- mMap.setMyLocationEnabled(true);
- // Get LocationManager object from System Service LOCATION_SERVICE
- LocationManager locationManager = (LocationManager) getSystemService(Context.LOCATION_SERVICE);
- // Create a criteria object to retrieve provider
- Criteria criteria = new Criteria();
- // Get the name of the best provider
- String provider = locationManager.getBestProvider(criteria, true);
- // Get Current Location
- Location myLocation = locationManager.getLastKnownLocation(provider);
- // set map type
- mMap.setMapType(GoogleMap.MAP_TYPE_NORMAL);
- // Get latitude of the current location
- double latitude = myLocation.getLatitude();
- // Get longitude of the current location
- double longitude = myLocation.getLongitude();
- // Create a LatLng object for the current location
- LatLng latLng = new LatLng(latitude, longitude);
- // Show the current location in Google Map
- mMap.moveCamera(CameraUpdateFactory.newLatLng(latLng));
- // Zoom in the Google Map
- mMap.animateCamera(CameraUpdateFactory.zoomTo(14));
- mMap.addMarker(new MarkerOptions().position(new LatLng(latitude, longitude)).title("You are here!").snippet("Consider yourself located"));
- }
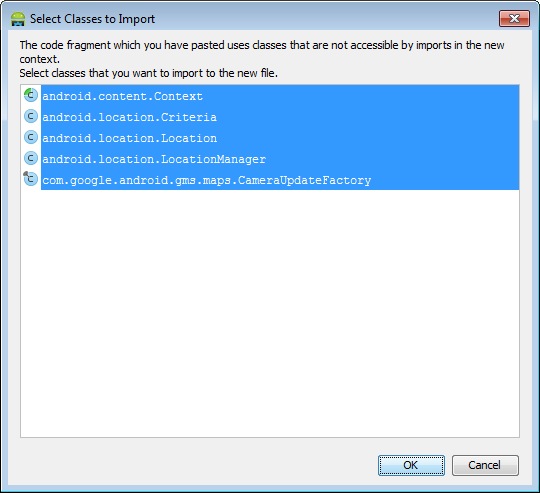
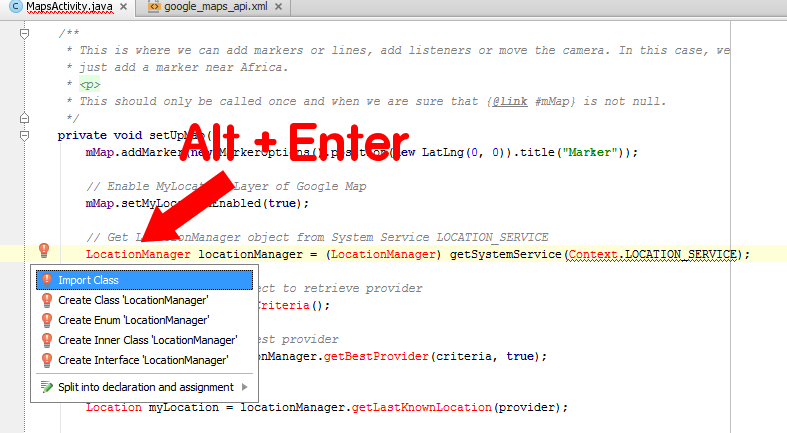
- Your code will now include the imported classes near the beginning, so TEST it!
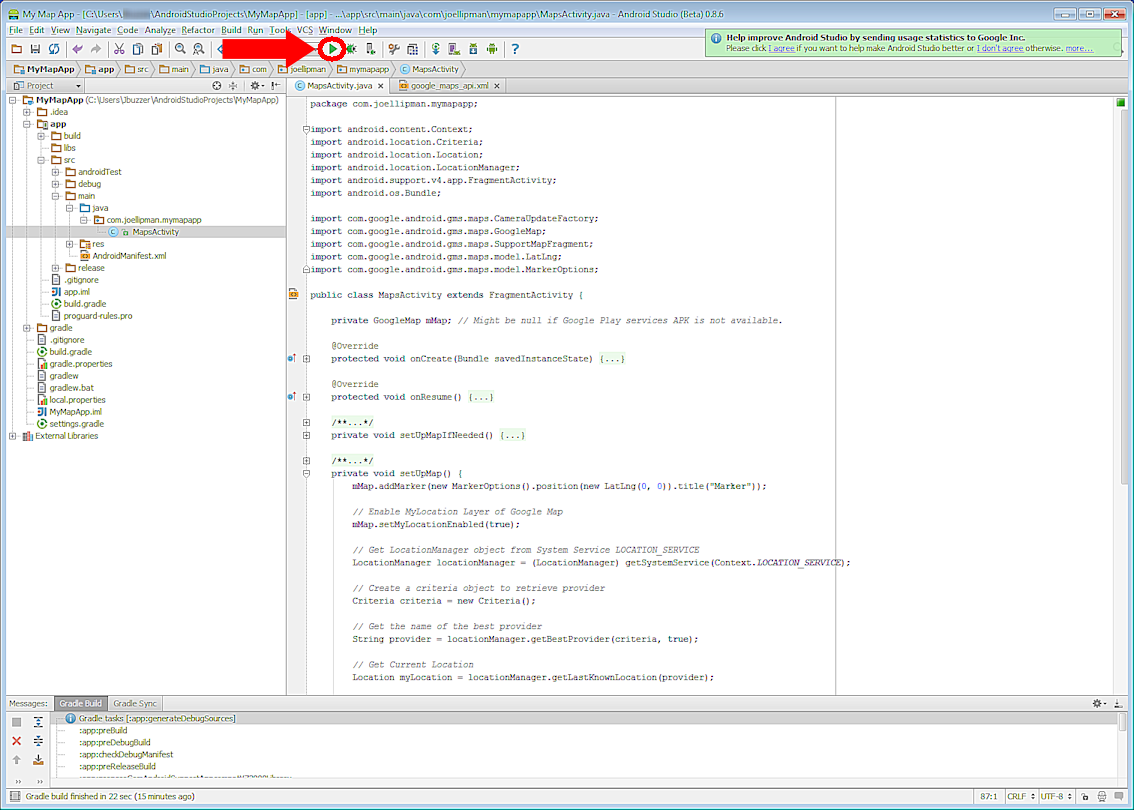
Addtional:
Problems animating the camera to your current location? I had to add the following:
copyraw
LatLng myCoordinates = new LatLng(latitude, longitude);
CameraUpdate yourLocation = CameraUpdateFactory.newLatLngZoom(myCoordinates, 12);
mMap.animateCamera(yourLocation);
- LatLng myCoordinates = new LatLng(latitude, longitude);
- CameraUpdate yourLocation = CameraUpdateFactory.newLatLngZoom(myCoordinates, 12);
- mMap.animateCamera(yourLocation);
Additional Additional:
A little more control on the animation?
copyraw
CameraPosition cameraPosition = new CameraPosition.Builder()
    .target(myCoordinates)      // Sets the center of the map to LatLng (refer to previous snippet)
    .zoom(17)                   // Sets the zoom
    .bearing(90)                // Sets the orientation of the camera to east
    .tilt(30)                   // Sets the tilt of the camera to 30 degrees
    .build();                   // Creates a CameraPosition from the builder
map.animateCamera(CameraUpdateFactory.newCameraPosition(cameraPosition));
- CameraPosition cameraPosition = new CameraPosition.Builder()
- .target(myCoordinates) // Sets the center of the map to LatLng (refer to previous snippet)
- .zoom(17) // Sets the zoom
- .bearing(90) // Sets the orientation of the camera to east
- .tilt(30) // Sets the tilt of the camera to 30 degrees
- .build(); // Creates a CameraPosition from the builder
- map.animateCamera(CameraUpdateFactory.newCameraPosition(cameraPosition));
Just in case: AndroidManifest.xml
The example above should have populated this correctly but if you are still getting problems, I have the following fields that I also use related to Google Maps v2:
copyraw
<meta-data
        android:name="com.google.android.gms.version"
        android:value="@integer/google_play_services_version" />
<meta-data
        android:name="com.google.android.maps.v2.API_KEY"
        android:value="@string/google_maps_key" />
<permission
        android:name="package.name.permission.MAPS_RECEIVE"
        android:protectionLevel="signature" />
<uses-feature
        android:glEsVersion="0x00020000"
        android:required="true" />
<uses-library
        android:name="com.google.android.maps" />
<uses-permission
        android:name="package.name.permission.MAPS_RECEIVE" />
<uses-permission
        android:name="android.permission.INTERNET" />
<uses-permission
        android:name="com.google.android.providers.gsf.permission.READ_GSERVICES" />
<uses-permission
        android:name="android.permission.ACCESS_COARSE_LOCATION" />
<uses-permission
        android:name="android.permission.ACCESS_FINE_LOCATION" />
- <meta-data
- android:name="com.google.android.gms.version"
- android:value="@integer/google_play_services_version" />
- <meta-data
- android:name="com.google.android.maps.v2.API_KEY"
- android:value="@string/google_maps_key" />
- <permission
- android:name="package.name.permission.MAPS_RECEIVE"
- android:protectionLevel="signature" />
- <uses-feature
- android:glEsVersion="0x00020000"
- android:required="true" />
- <uses-library
- android:name="com.google.android.maps" />
- <uses-permission
- android:name="package.name.permission.MAPS_RECEIVE" />
- <uses-permission
- android:name="android.permission.INTERNET" />
- <uses-permission
- android:name="com.google.android.providers.gsf.permission.READ_GSERVICES" />
- <uses-permission
- android:name="android.permission.ACCESS_COARSE_LOCATION" />
- <uses-permission
- android:name="android.permission.ACCESS_FINE_LOCATION" />
Last Additional
Ensure that when Google asks for your Android API key, you enter the production key (which may be the same as your testing key); the one from your app and not from your computer (as other people don't use your computer to access the service). If your fellow testers only see a grey map, just double-check the key is the right one given to Google Maps.
Follow On Article/Sequel
Next: Article on separating the map into a sub-activity rather than it being the main activity - Android OS: Add GoogleMap as fragment.
Category: AndroidOS :: Article: 585





Add comment