This is an article to document how to receive a JSON response from a webhook created in Shopify. See my article: Zoho Deluge: Push Item to Shopify API if you want information on setting up an integration from Zoho Creator to Shopify API.
Why?
In this example, we want a webhook that whenever an order is made in Shopify, it tells our Zoho Creator app. Note that at the time of this article, API v1 is deprecated (so no authtokens) and API OAuth2.0 is in full swing... we're still going to cheat.
How?
1,2,3 steps really. First we're going to set up a Creator form to receive the JSON. Secondly, we'll create the endpoint URL for the webhook. And thirdly, we'll create the Shopify webhook.
One alternative that is proposed below is that we are going to use a CRM REST API function which arguably could write directly to the Creator record, parsing the JSON webhook response beforehand.
1. Set up the Creator form
- Log-in to your Zoho Creator app
- Click on Plus sign to add a new form > blank
- Name the form, I'm going to call mine Shopify Webhook Payloads
- Drag some fields onto the form, this is what I did:
- Event Type [Drop Down: with options "Order Update", "Inventory Update", "Product Update"]
- JSON Payload [Multi Line]

2. Joel's first Cheat: If your client has ZohoCRM, let's use a CRM REST Function
Granted this only works if you have a CRM connected to your Zoho Creator:
- Log-in to your ZohoCRM
- Create a Connection
- Go to Setup > Developer Space > Connections > Add Connection
- Select the Zoho Creator connection, give it a Connection Name, I'm going with joels_creator
- Give it a lowercase Connection Link name
- Select the scopes: ZohoCreator.form.CREATE and ZohoCreator.report.CREATE
- Click on Create and Connect > Note the connection link name (if you've already forgotten)
- Create a REST API Zoho CRM Function
- Go to Setup > Developer Space > Functions > New Function
- Give it a Function Name, I'll call mine fn_Shopify_Webhook_OrderUpdate
- Give it a Display Name, I'll give it Shopify - Webhook - Order Update
- Specify the Category, I'm going to say Standalone
- Specify the Function parameters/Arguments EXACTLY as this: crmAPIRequest of data type string. IMPORTANT! It won't work if you don't include this parameter.
- For the code of the function this is what I did, you can eventually develop this to do more but I'm coding for this example and for this demonstration only (obviously replace the my_owner and my_app with your Zoho Creator owner and app name respectively) Update 2022: I've included the code to verify the webhook came from Shopify:copyraw
// // declare response variable back to Shopify m_Response = Map(); // // enter webhook key featured in the "settings > notifications > webhooks" section beneath the webhooks where it says // "All your webhooks will be signed with .... so you can verify their integrity" (obtained further below in this article) v_Webhook_Key = "aaaabbbbccccddddeeeeffff1111222233334444555566667777888899990000"; // // convert the data from Shopify webhook to a map m_Payload = crmAPIRequest.toMap(); // // get webhook signature v_ShopifySignature = "SIGNATURE_FAIL"; if(!isnull(m_Payload.get("headers"))) { if(!isnull(m_Payload.get("headers").get("x-shopify-hmac-sha256"))) { v_ShopifySignature = m_Payload.get("headers").get("x-shopify-hmac-sha256"); } } // // default response code (unauthorized) v_ResponseCode = 401; // // encrypt body with Sha-256 v_WebhookBodyHMACSHA256 = "ENCRYPTION_FAIL"; if(!isnull(m_Payload.get("body"))) { v_WebhookBodyHMACSHA256 = zoho.encryption.hmacsha256(v_Webhook_Key,m_Payload.get("body")); } // // compare signatures if(v_WebhookBodyHMACSHA256 == v_ShopifySignature) { v_ResponseCode = 200; } m_Response.put("status_code",v_ResponseCode); // // setup Zoho Creator entry m_Blank = Map(); m_CreateRecord = Map(); m_CreateRecord.put("Event_Type","Order Update"); m_CreateRecord.put("JSON_Payload",m_Payload.toString()); r_CreateRecord = zoho.creator.createRecord("my_owner","my_app","Shopify_Webhook_Payloads",m_CreateRecord,m_Blank,"joels_creator"); // // return Zoho response to Shopify return {"crmAPIResponse":m_Response};- //
- // declare response variable back to Shopify
- m_Response = Map();
- //
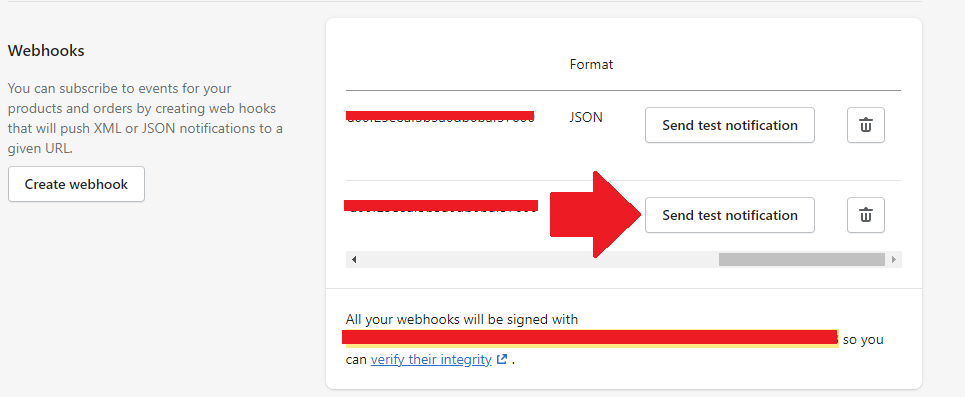
- // enter webhook key featured in the "settings > notifications > webhooks" section beneath the webhooks where it says
- // "All your webhooks will be signed with .... so you can verify their integrity" (obtained further below in this article)
- v_Webhook_Key = "aaaabbbbccccddddeeeeffff1111222233334444555566667777888899990000";
- //
- // convert the data from Shopify webhook to a map
- m_Payload = crmAPIRequest.toMap();
- //
- // get webhook signature
- v_ShopifySignature = "SIGNATURE_FAIL";
- if(!isnull(m_Payload.get("headers")))
- {
- if(!isnull(m_Payload.get("headers").get("x-shopify-hmac-sha256")))
- {
- v_ShopifySignature = m_Payload.get("headers").get("x-shopify-hmac-sha256");
- }
- }
- //
- // default response code (unauthorized)
- v_ResponseCode = 401;
- //
- // encrypt body with Sha-256
- v_WebhookBodyHMACSHA256 = "ENCRYPTION_FAIL";
- if(!isnull(m_Payload.get("body")))
- {
- v_WebhookBodyHMACSHA256 = zoho.encryption.hmacsha256(v_Webhook_Key,m_Payload.get("body"));
- }
- //
- // compare signatures
- if(v_WebhookBodyHMACSHA256 == v_ShopifySignature)
- {
- v_ResponseCode = 200;
- }
- m_Response.put("status_code",v_ResponseCode);
- //
- // setup Zoho Creator entry
- m_Blank = Map();
- m_CreateRecord = Map();
- m_CreateRecord.put("Event_Type","Order Update");
- m_CreateRecord.put("JSON_Payload",m_Payload.toString());
- r_CreateRecord = zoho.creator.createRecord("my_owner","my_app","Shopify_Webhook_Payloads",m_CreateRecord,m_Blank,"joels_creator");
- //
- // return Zoho response to Shopify
- return {"crmAPIResponse":m_Response};
- Save the function
- Return to the functions list and hover your mouse over the function you just created until an ellipsis/3 dot icon appears > Click on it and select REST API.
- Enable the API Key option and click on the Copy icon to copy the url to clipboard.

3. Set up the Shopify webhook
- Log-in to your Shopify as an admin
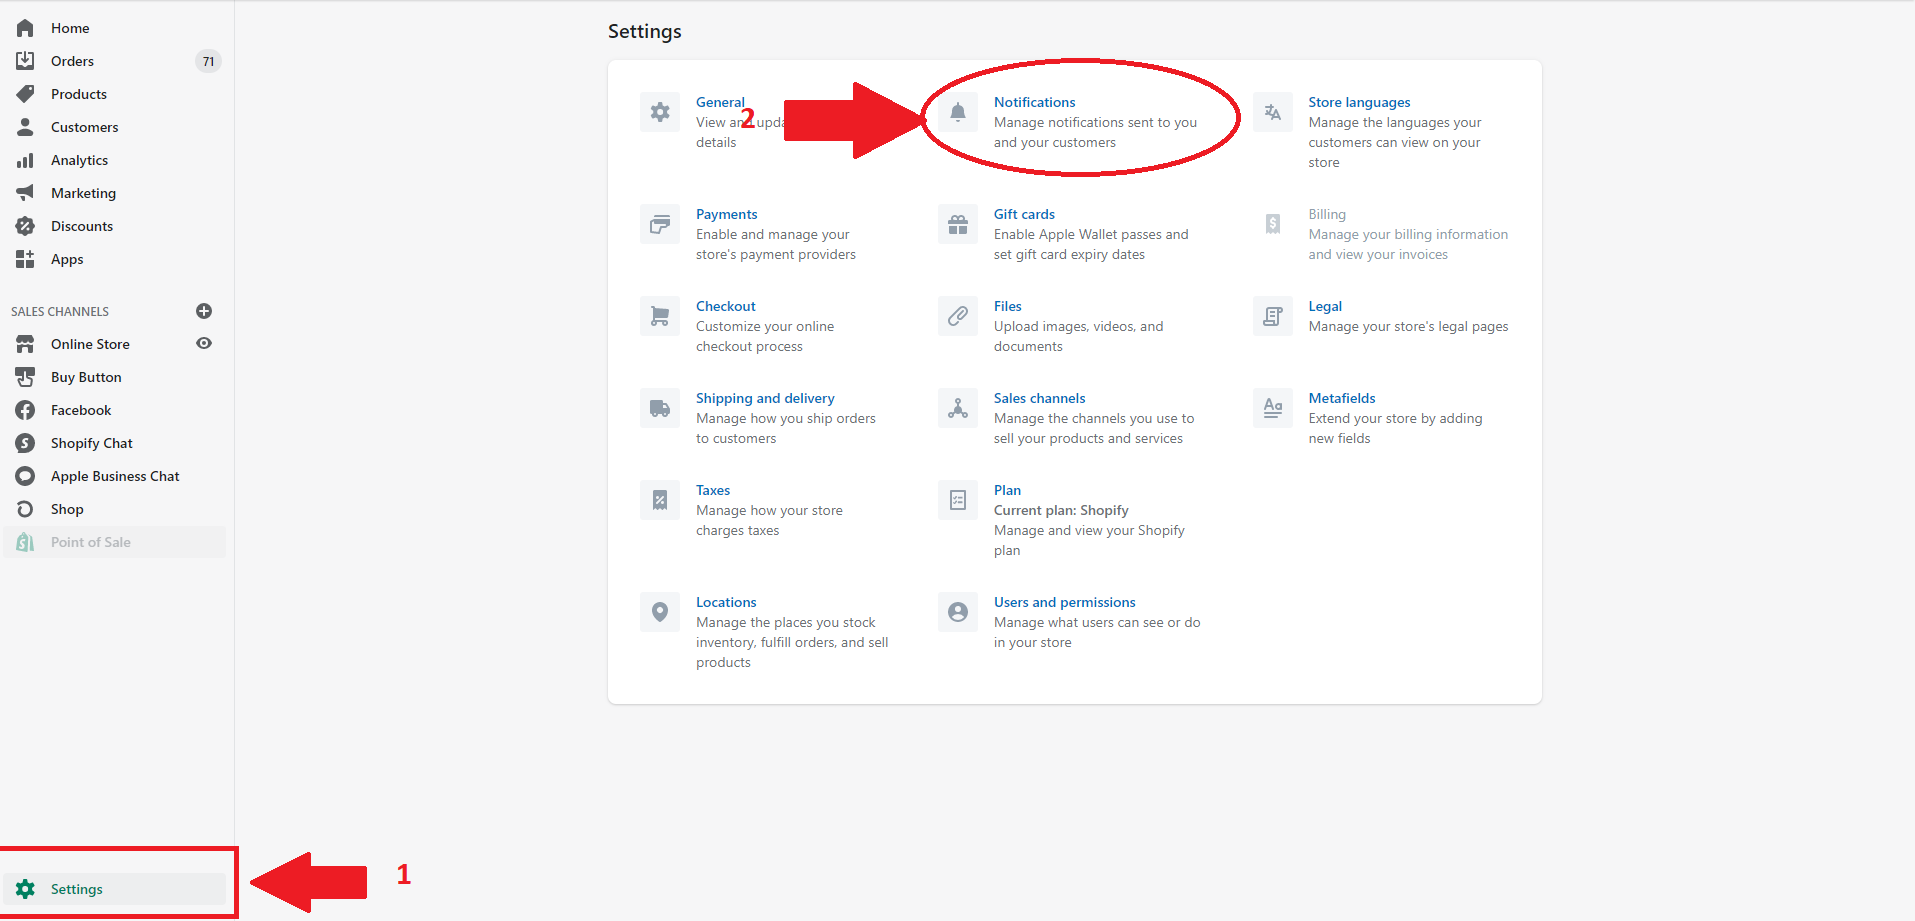
- Go to Settings (left sidebar right at the bottom)
- Click on Notifications
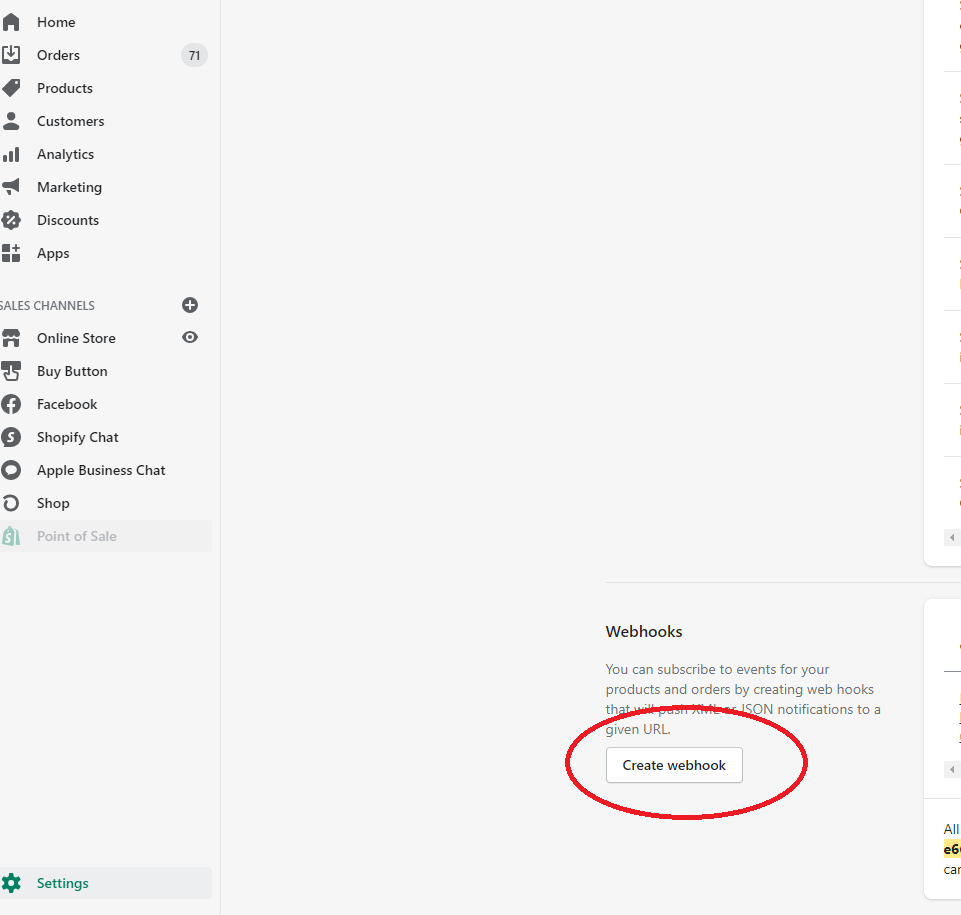
- Scroll all the way down the page until you arrive at Webhooks
- Click on Create webhook
- Under Event select Order Update
- Under Format select JSON
- Under URL, paste the URL for your CRM REST API function from the steps above.
- Under Webhook API version I specify the one with the word Latest in the parentheses.
- Click on Save
Let's TEST
So wait patiently until you get an order.... just joe-king! In the admin section of Shopify where you just created the webhook, scroll to the end of that row listing your webhook and click on the button Send test notification.
It will go through your CRM which will in turn forward the JSON payload to your Zoho Creator record:
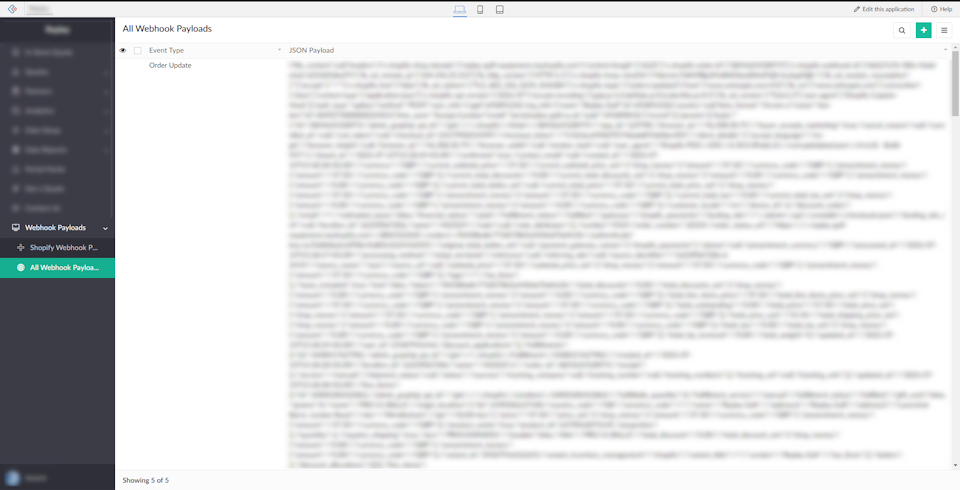
I'll leave it up to you to parse that mess but the Shopify webhook payload is now in your Zoho Creator! Having used this for a while, we average about 5 seconds from when the Order is updated (with payment?) in Shopify to when it gets parsed and created in the Creator system.
Alternative Solution without CRM
A proposed solution has been to create a Zoho Creator form and publishing this for public use. Then giving Shopify the URL to the form and populating a field called "body". I might test this if I come across a client who doesn't use CRM.
Category: Zoho :: Article: 751


Add comment